Hello everybody!
I am very excited to finally post my first eye makeup tutorial!
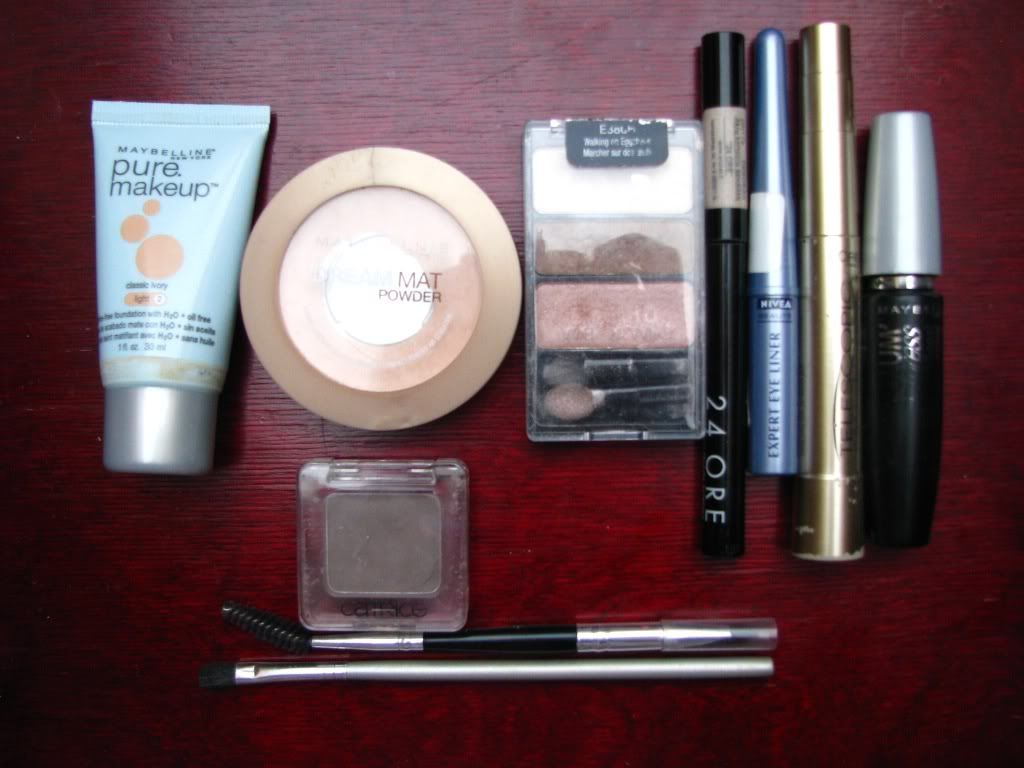
The products that I used for this look can be easily substituted but I will list most of what I used:
- Maybelline Pure makeup shine-free foundation - since I don't use concealer, I use my foundation to even out the skin tone around my eyes;
- Maybelline DreamMat powder - for setting the foundation;
- Wet'n Wild eyeshadow pallete in "Walking on Eggshells";
- Deborah felt tip eyeliner "24 ORE";
- Nivea expert eye liner - liquid eyeliner;
- Loreal Telescopic mascara in black;
- Maybelline Volum express waterproof mascara.
Now let's proceed to the tutorial!
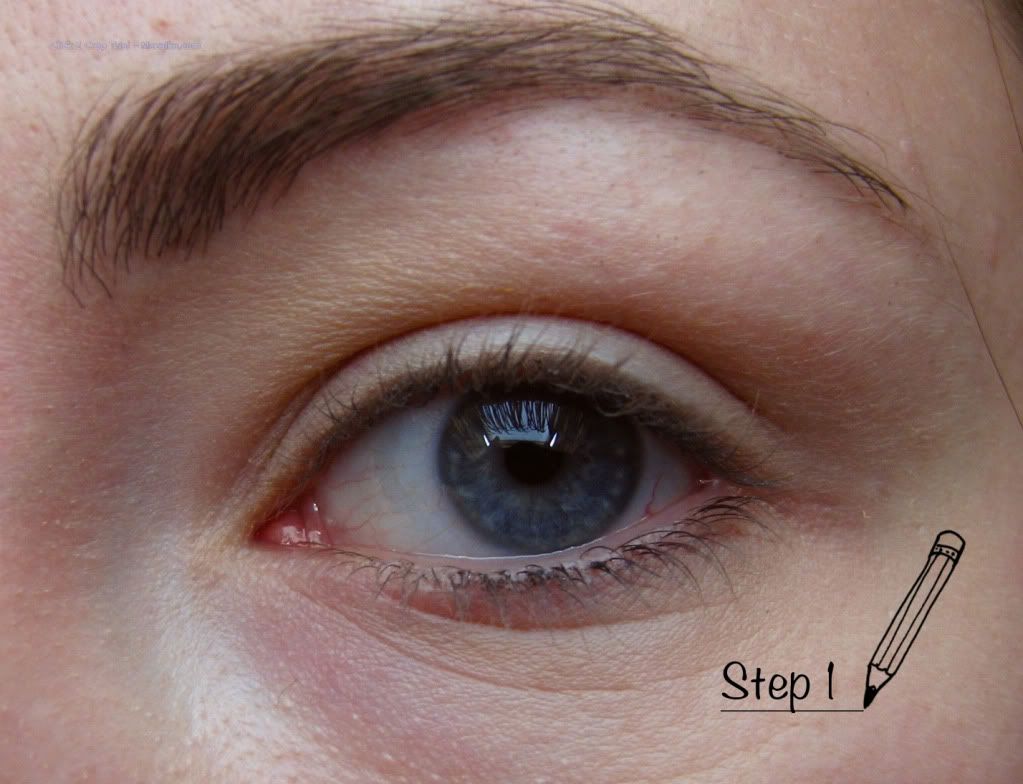
Step 1: I have applied my foundation also putting it around my eyes and on my eyelids to brighten up my skin tone and make me look more awake and fresh. Also I have my eyebrows filled in with eyeshadow.
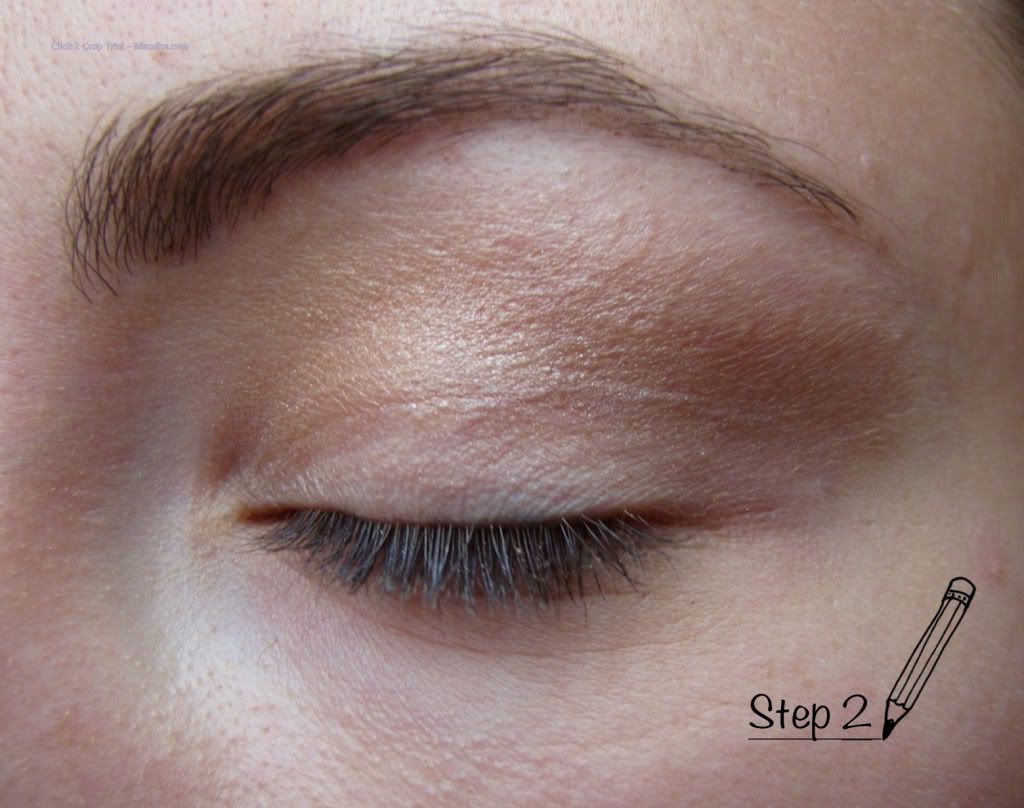
Step 2: Now I start working with eyeshadows. Before this you might want to apply an eyeshadow base in case you have oily eyelids and it would help your eye makeup (all that hard work!) stay on for longer and not smudge as much.
With a flufy blending brush I took the peachy rose colour from the pallete listed above and placed it in my crease and above avoiding the eyelid. Concentrate mostly on the outter part, this will give you a nice enlongened eye effect. Using the brush, I blended edges esspecially above the crease.
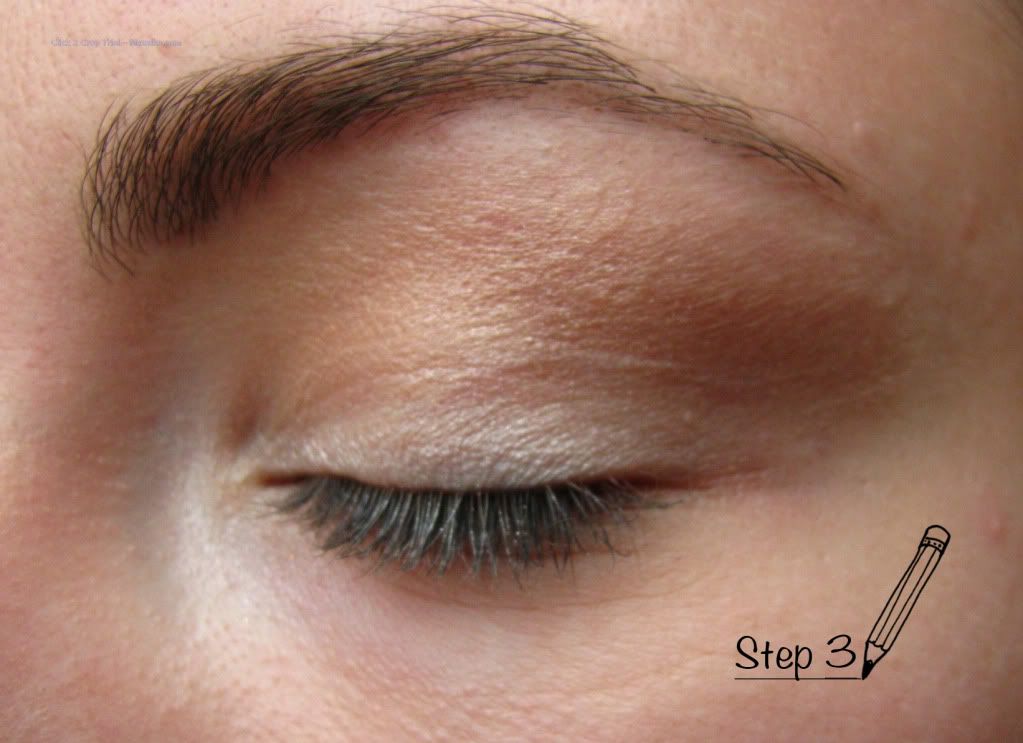
Step 3: Now taking the light shimmery colour form the pallete you want to place it on the center of your lid and in the inner corrner of your eye. I do this using my finger since I'm not a huge brush user.
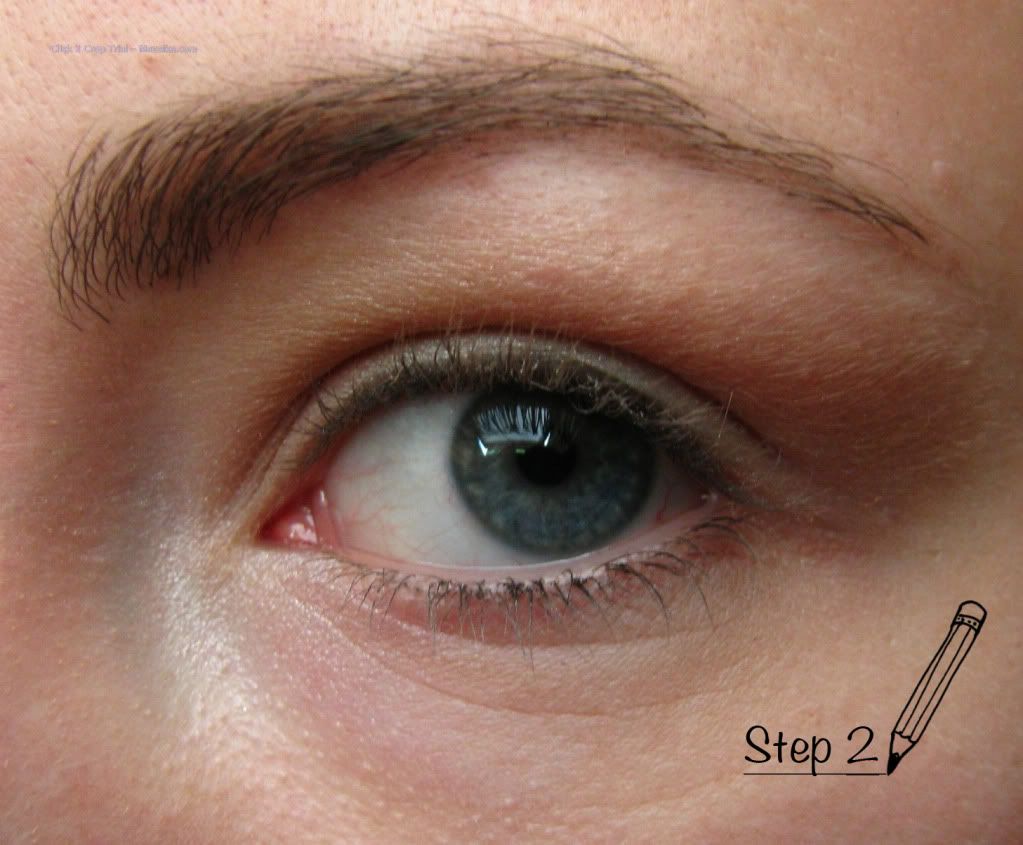
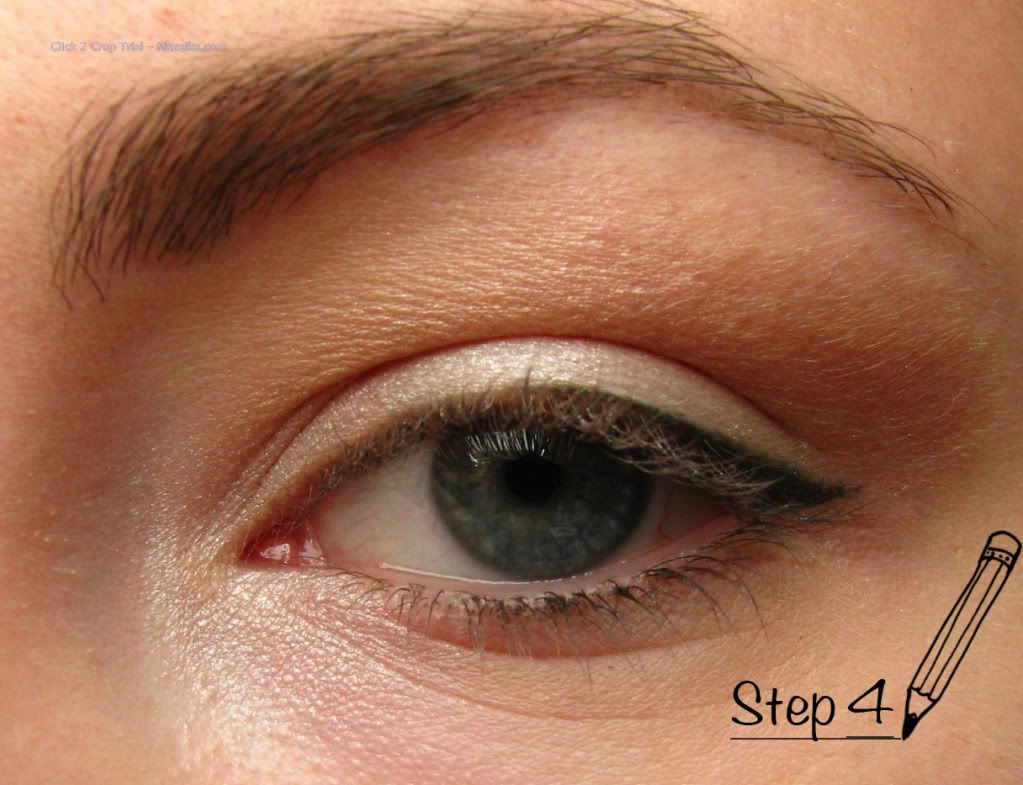
Step 4: Finally the fun but tricky part - eyeliner. I am using a felt tip eyeliner and starting form the center of my eye I draw a fine line as close to my lash line as possible; the line starts as fine and continues to get a bit thicker as it goes out.
Now, one important thing to have in mind during this step is that a line starting from the middle of your eye should be fine in the beginning to create an illusion that it is continuing your natural eye shape. You don't want to draw an unnatural looking line, you want it to enhance you eye shape (in other words I could call it your "upper lid curve").
Finally to finish the line, create a tiny flick in the end to give your eye some extra length. Since this is an everyday look for daytime, you don't want it to be too dramatical. Make it tiny and cute!
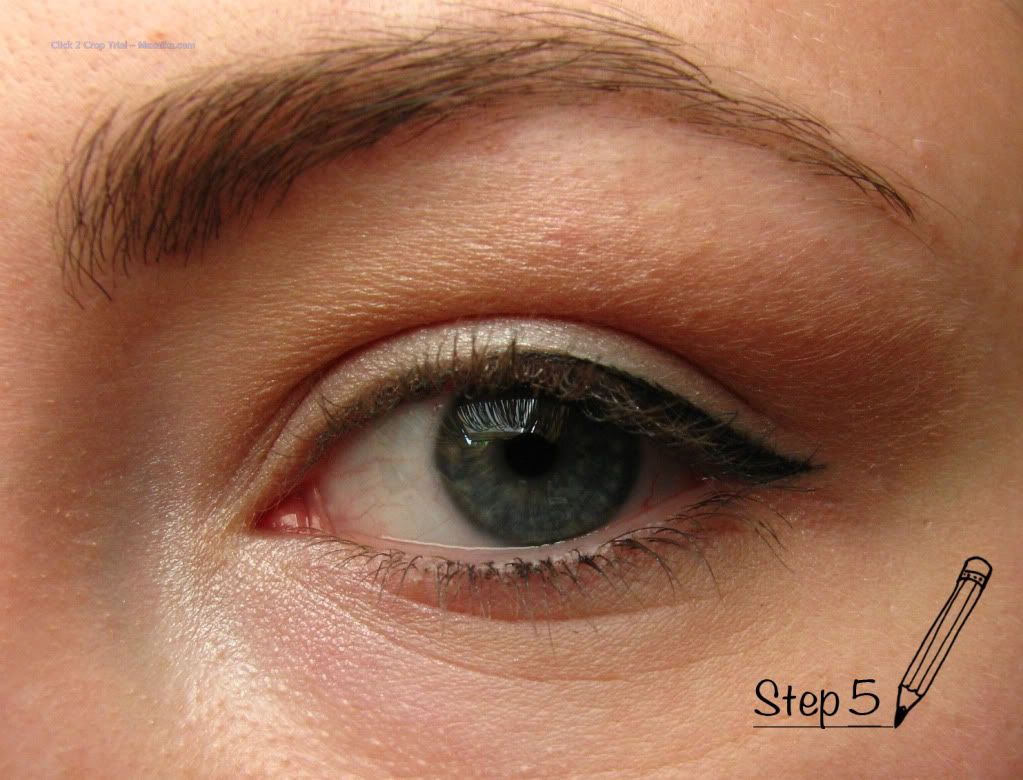
Step 5: This step is optional. In the steo before I used a felt tip eyeliner which is supposed to be quite intensive and longlasting. It was like that in when I bought t a few months ago. Now it looks wuite soft on the eye - I'd say quite perfect for this look! But since my eyes tend to get quite watery if let's say it's windy outside, my eye makeup in the outter corner tends to smudge. To prevent that I used my liquid eyeliner and painted it over the line I made. This intensifies the line and helps it stay longer!
p.s. You could also say that I used the felt tip as a guid for my liquid liner !
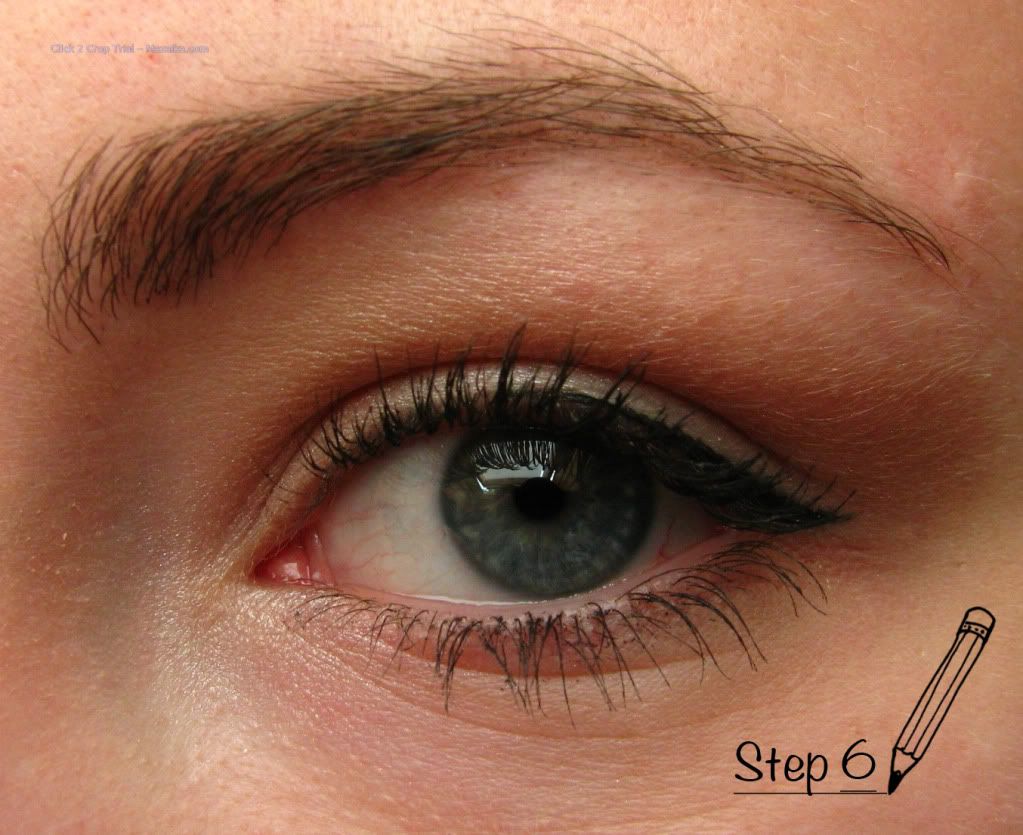
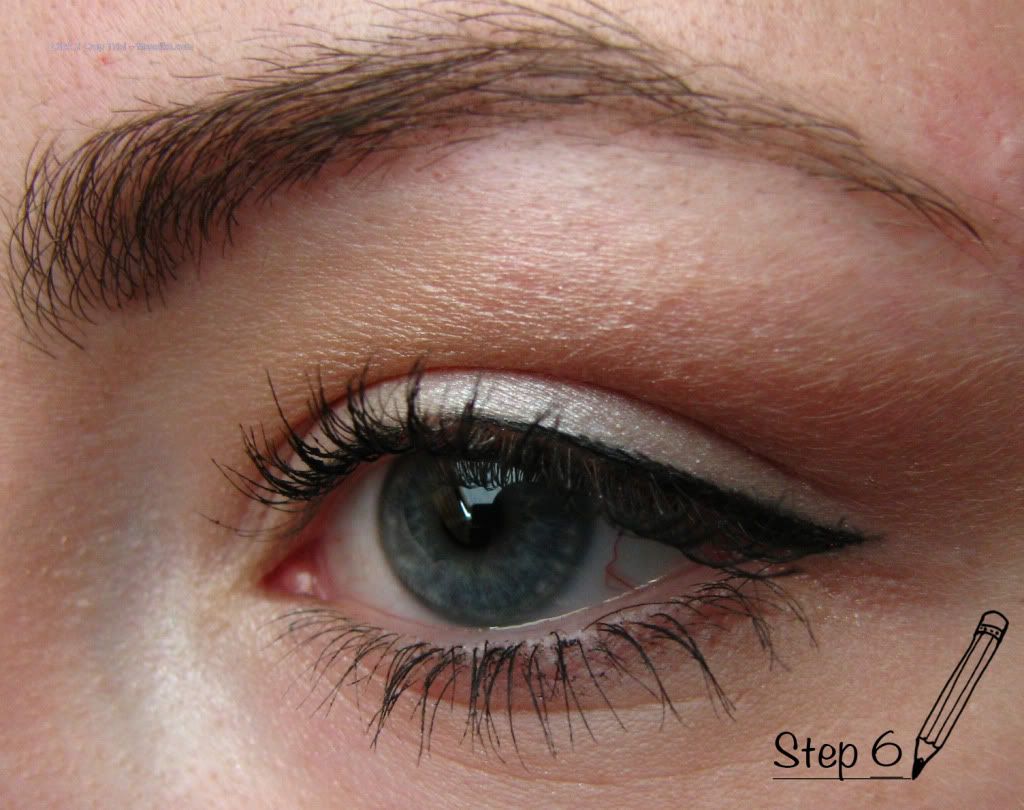
Step 6: Last step! Apply mascara on both upper and lower lashes. Concentrate on the outter part to lengthen the eye. I use waterproof mascara on my lower lashes because during the day it tends to smudge a bit.
And you're eye makeup is ready!
Don't forget to smile and have a lovely day!
Yours,
Miss K.

No comments:
Post a Comment