Friday 30 November 2012

TIPS: close set eyes!

Ciao!

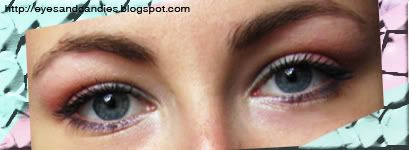
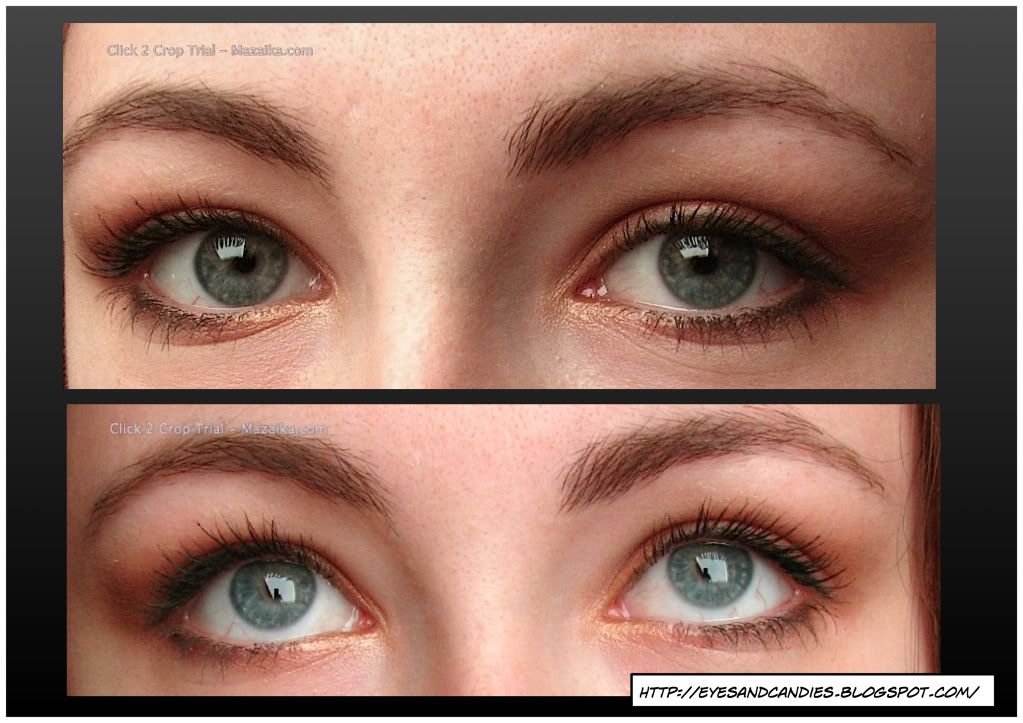
As I was doing my makeup today (which I decided to do very simply) it occurred to me that this eyelook actually suits me pretty well, especially because I think my eyes are a bit too closely set, and what I did made them look more further away from eacher, hence my face looks more proportional.

SO I decided to share my tips for close set eyes!

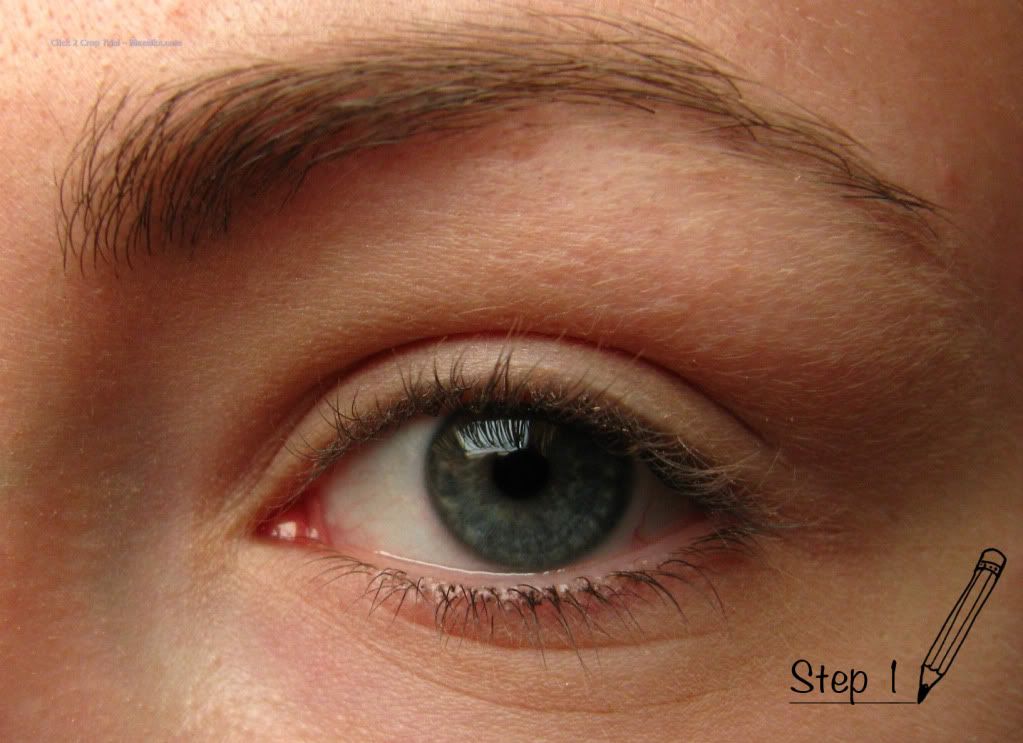
What's to be done is to elongate the eyes, cheating, to be exact!

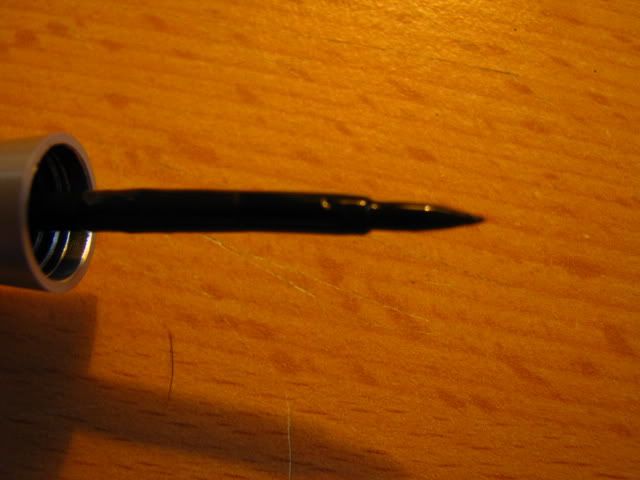
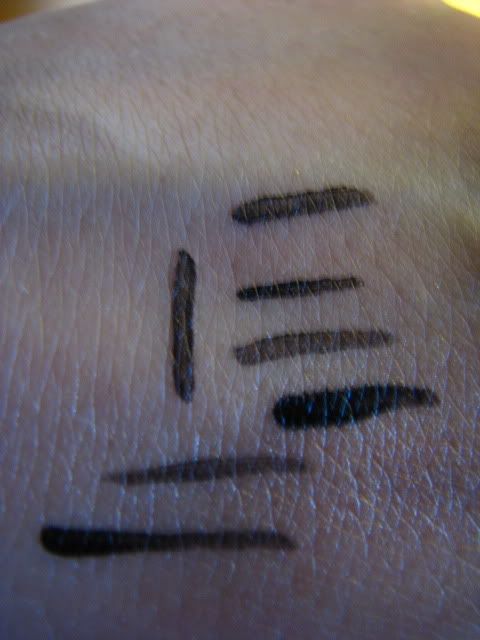
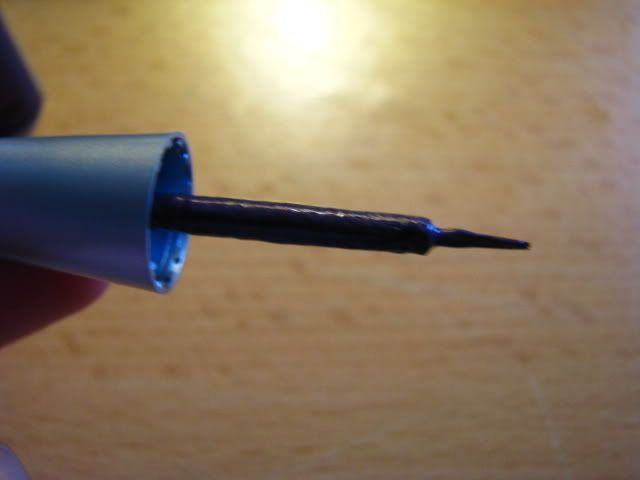
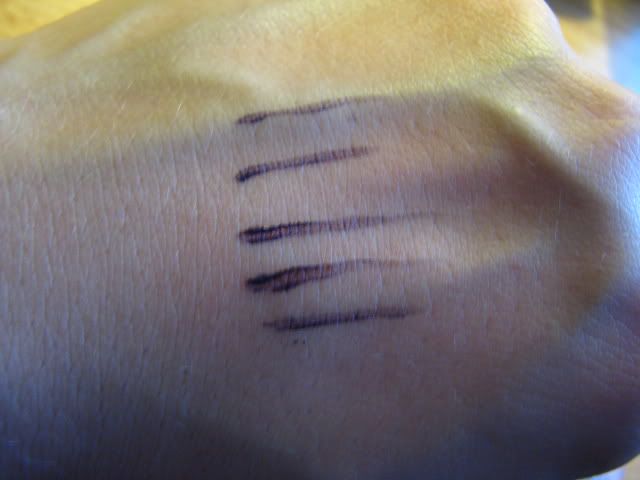
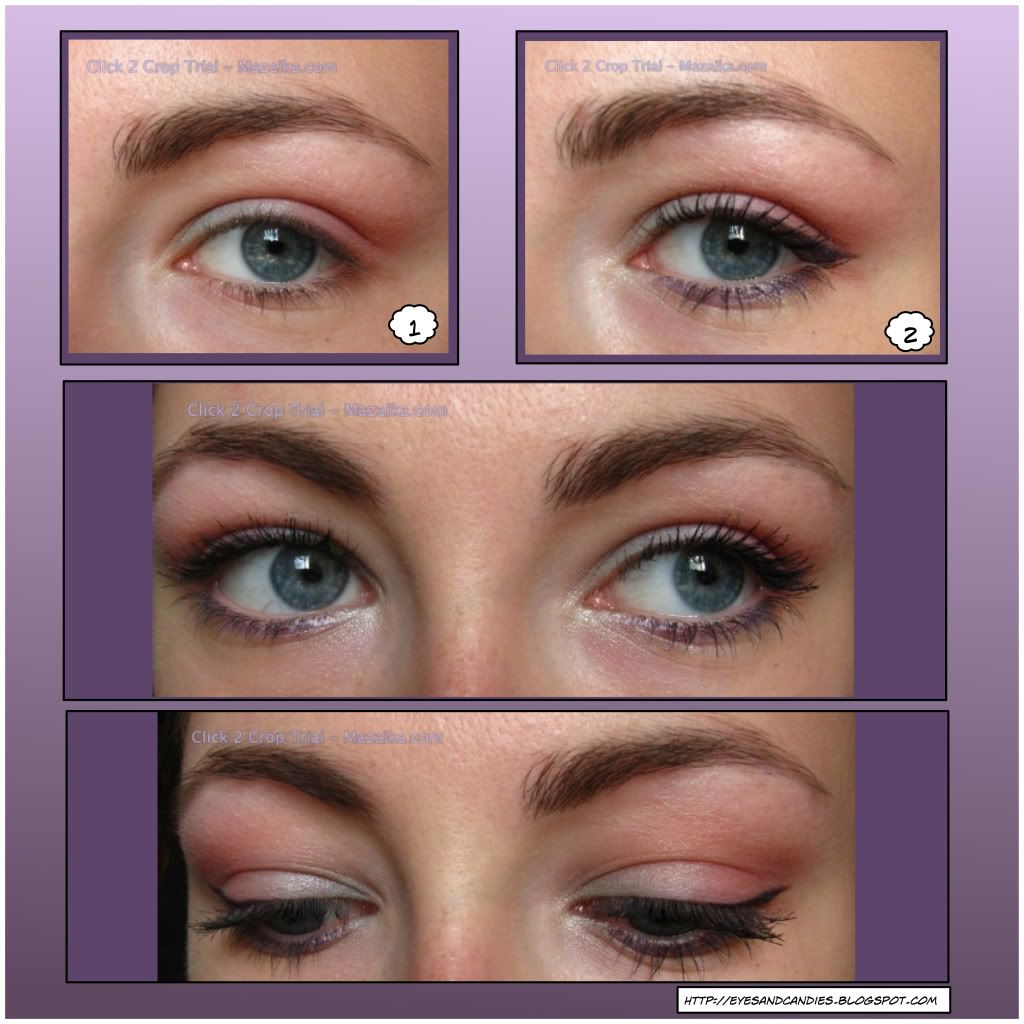
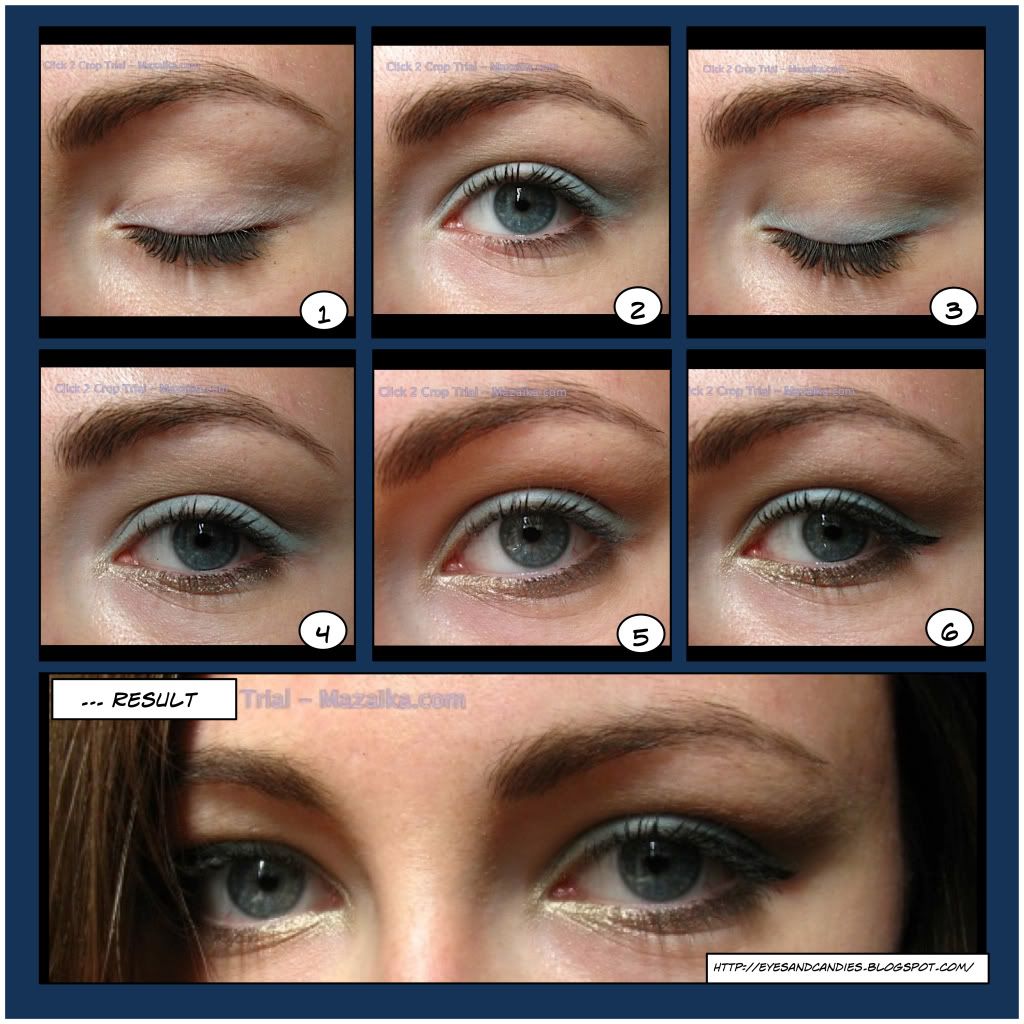
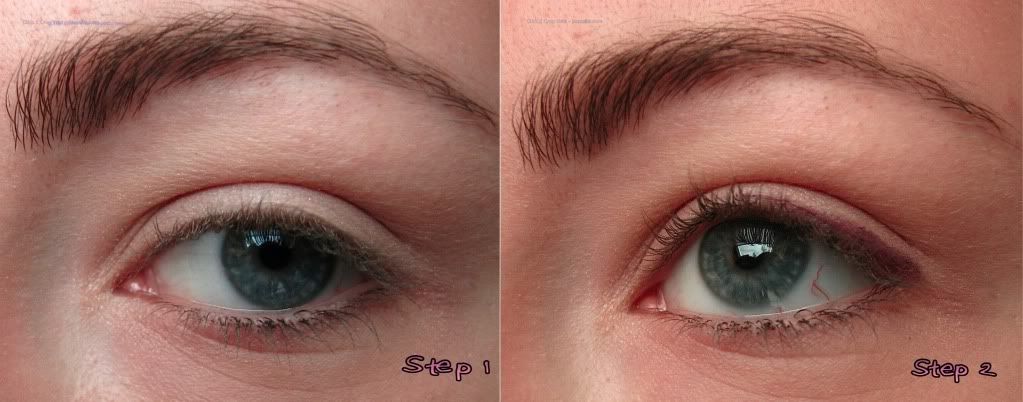
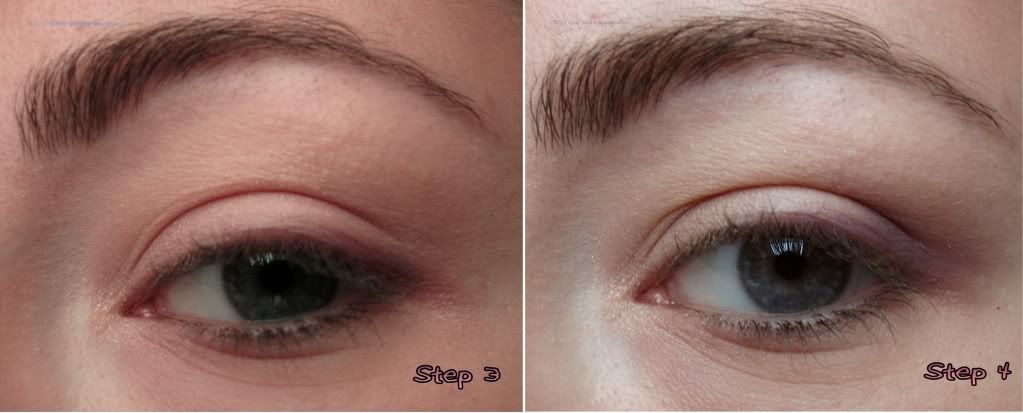
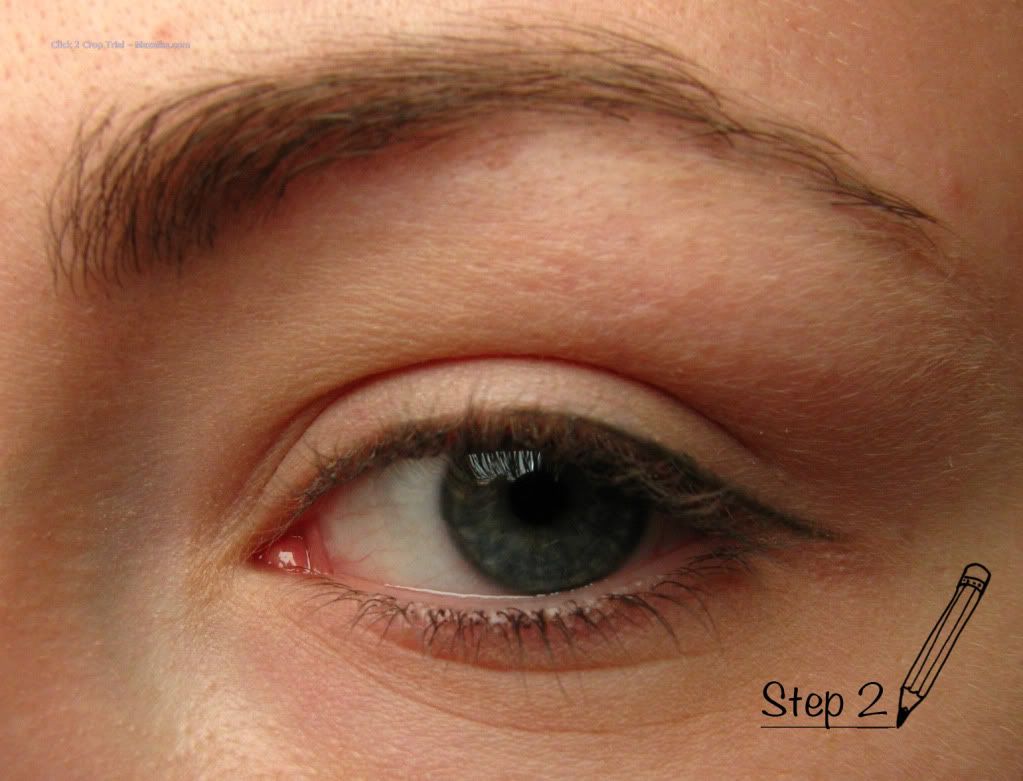
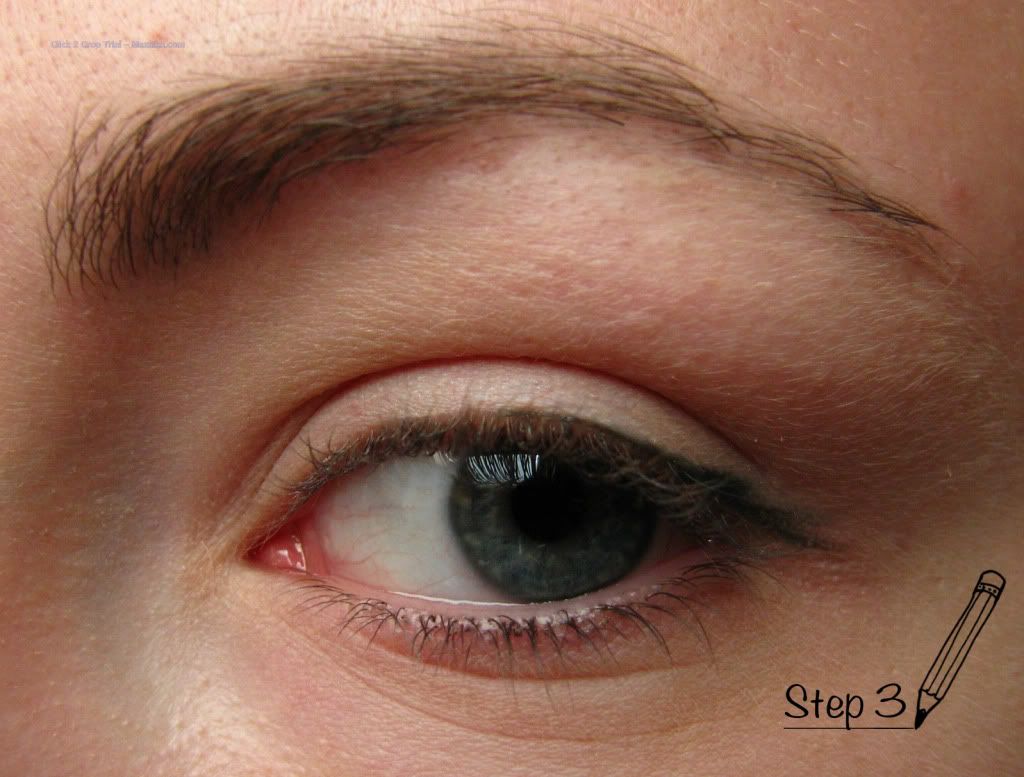
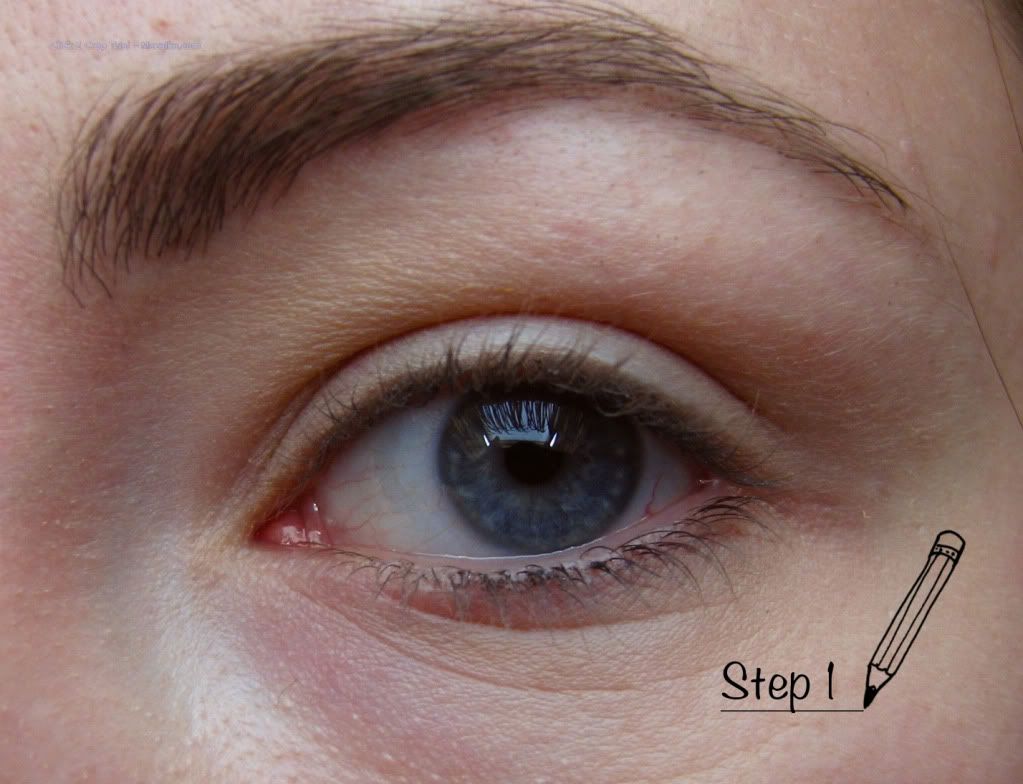
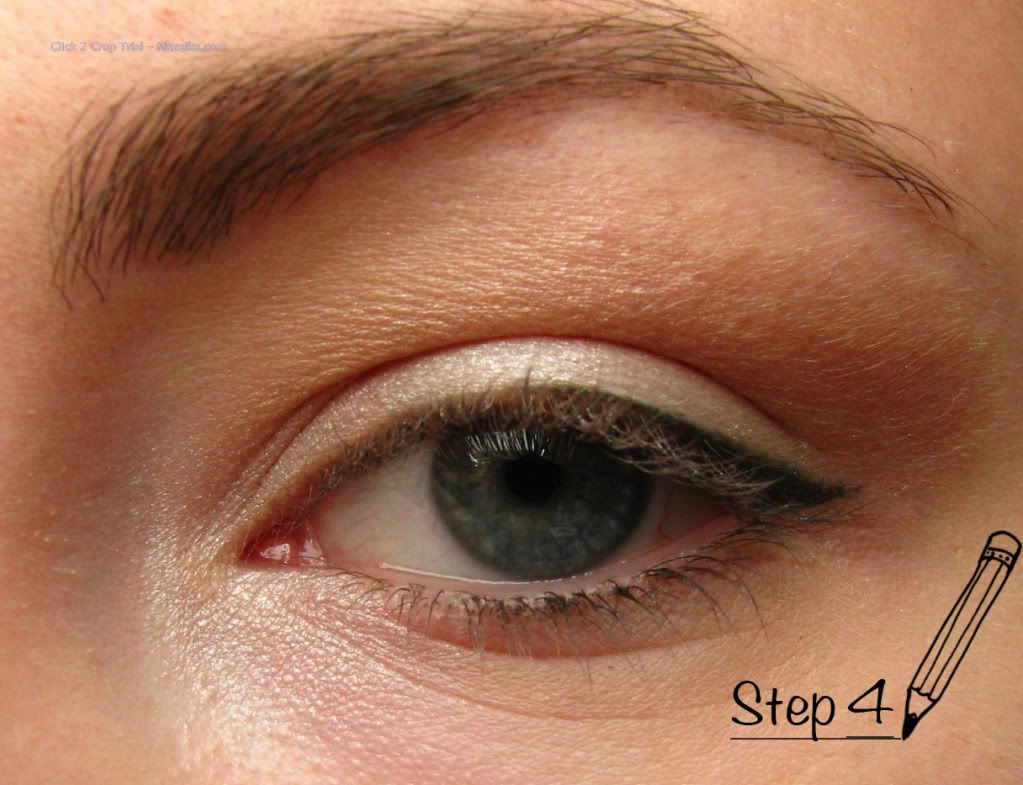
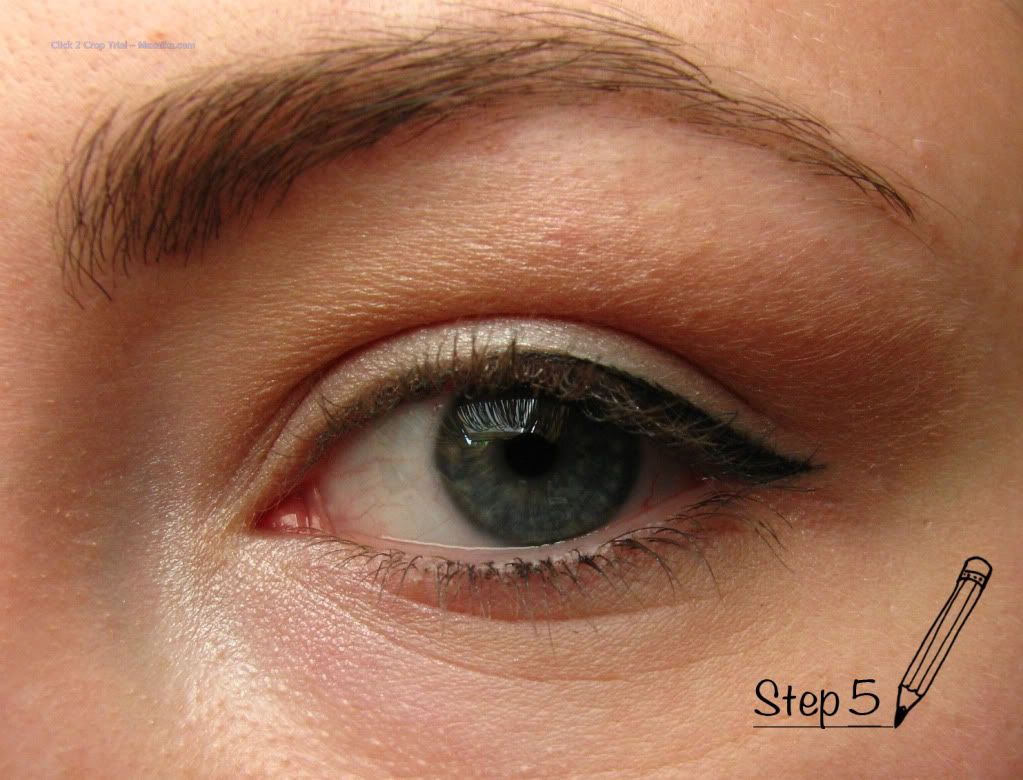
Tip Nr. 1 - Eyeliner :  I don't want to draw attention to the inner corners to my eyes but want to excentuate the length of the eyelid. So when lining your upper eyelid, start at least  at a third inner part away, I start at about the middle  and the further the thicker the line should be , but not too thick. Wing it out a little bit, and your eyes already should look wider set apart!

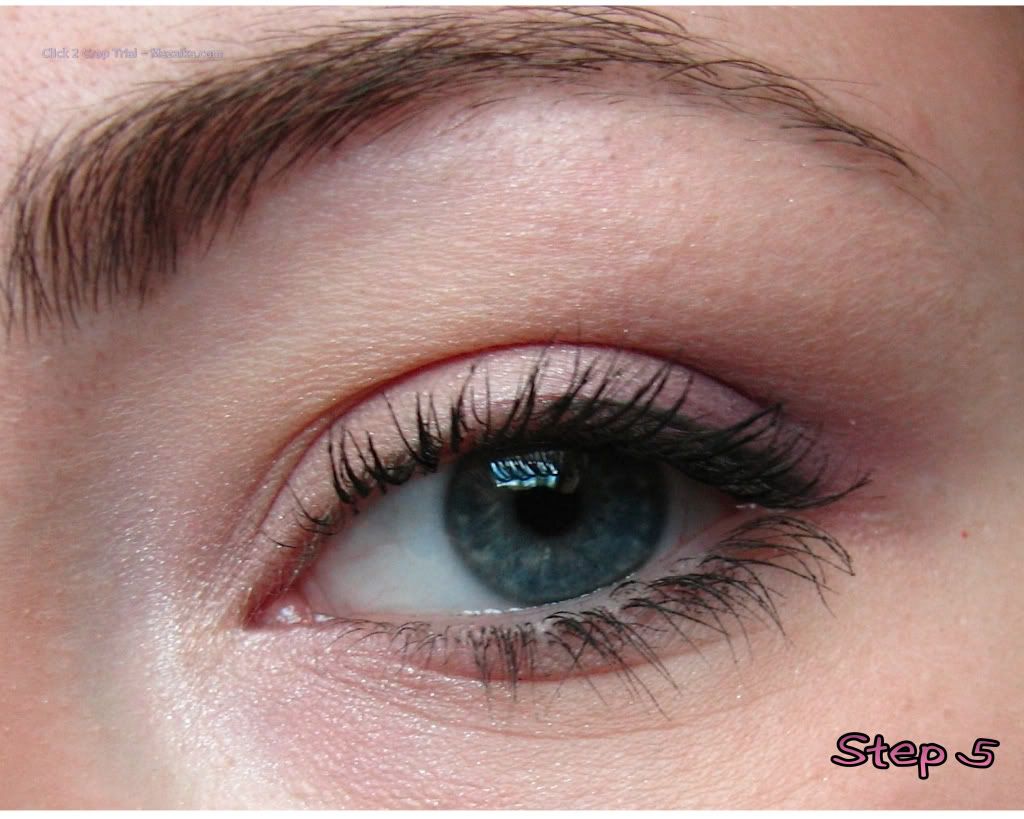
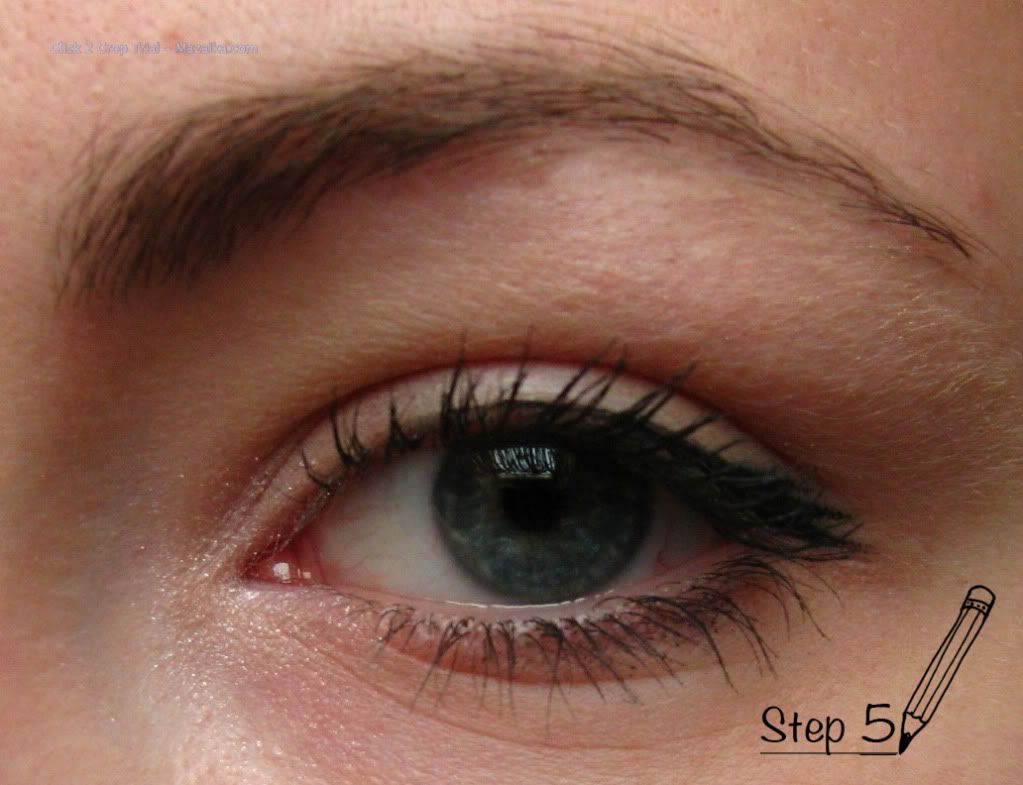
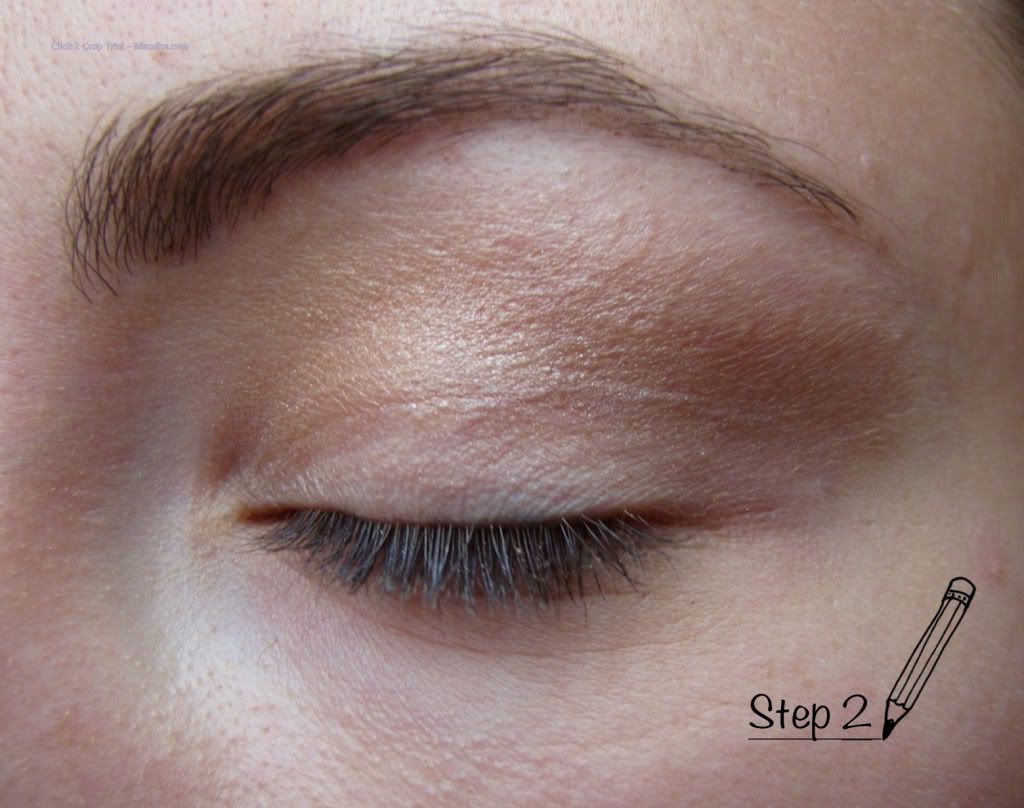
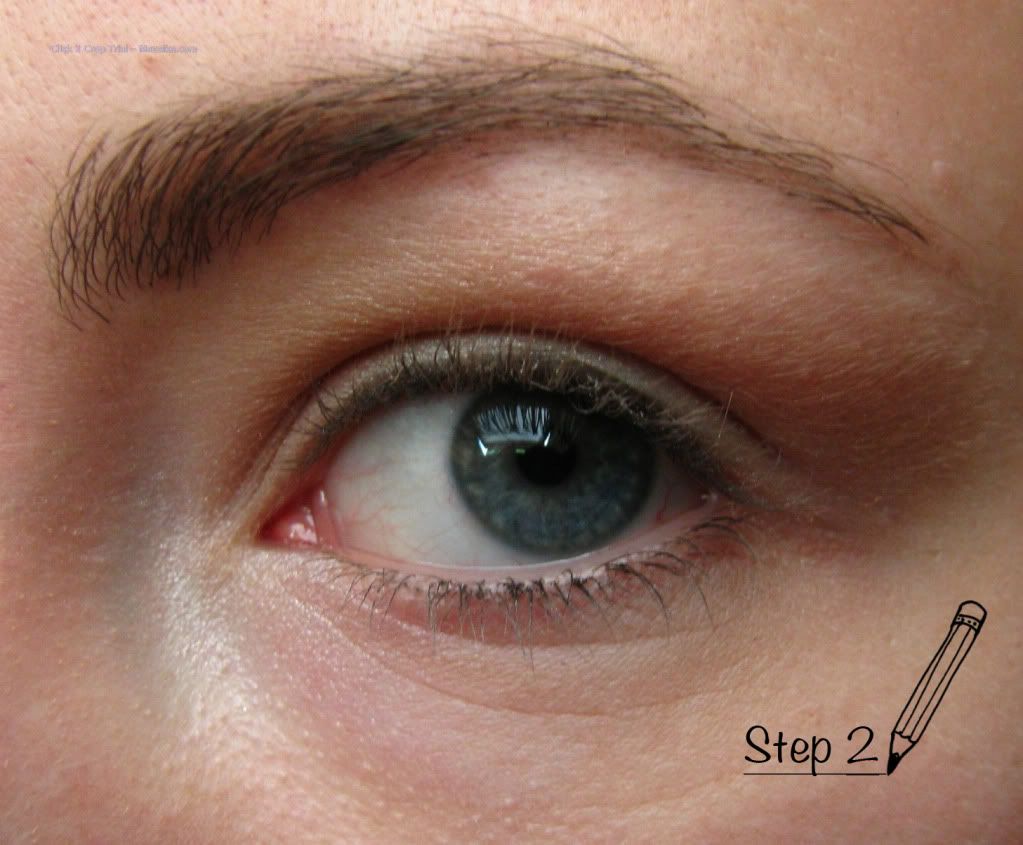
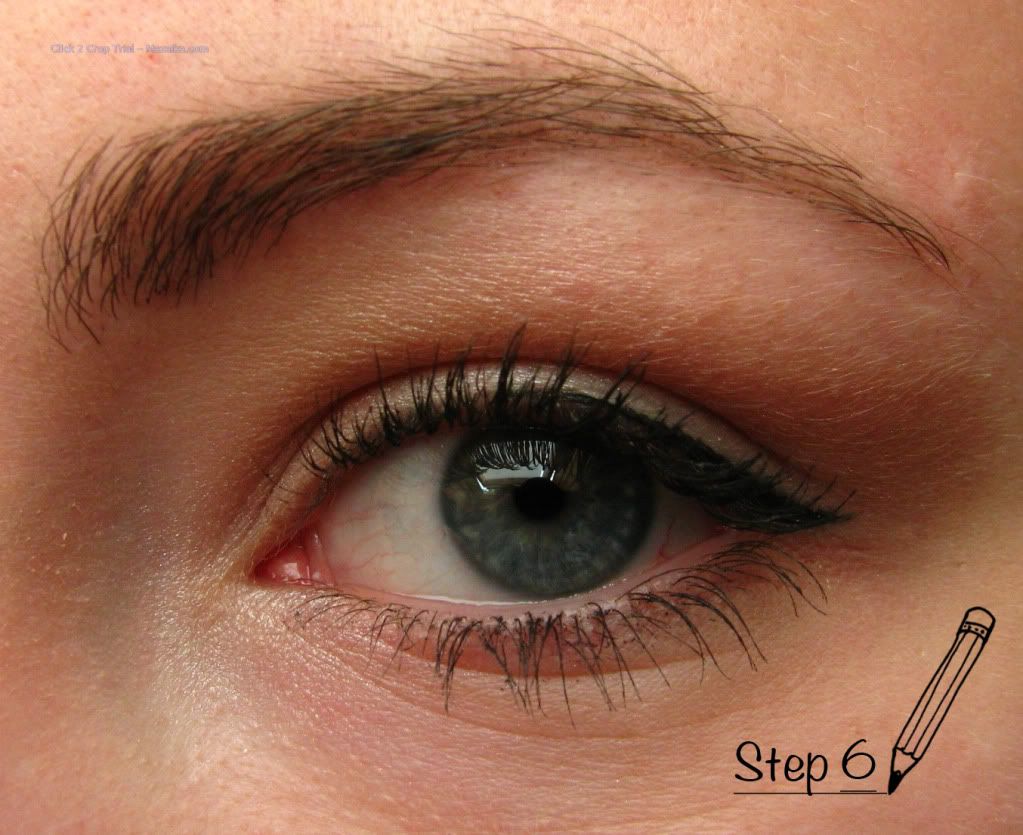
Tip Nr. 2 - Mascara :  When applying mascara to the lashes, brush them to the outer side of the eye accenting the outer part!

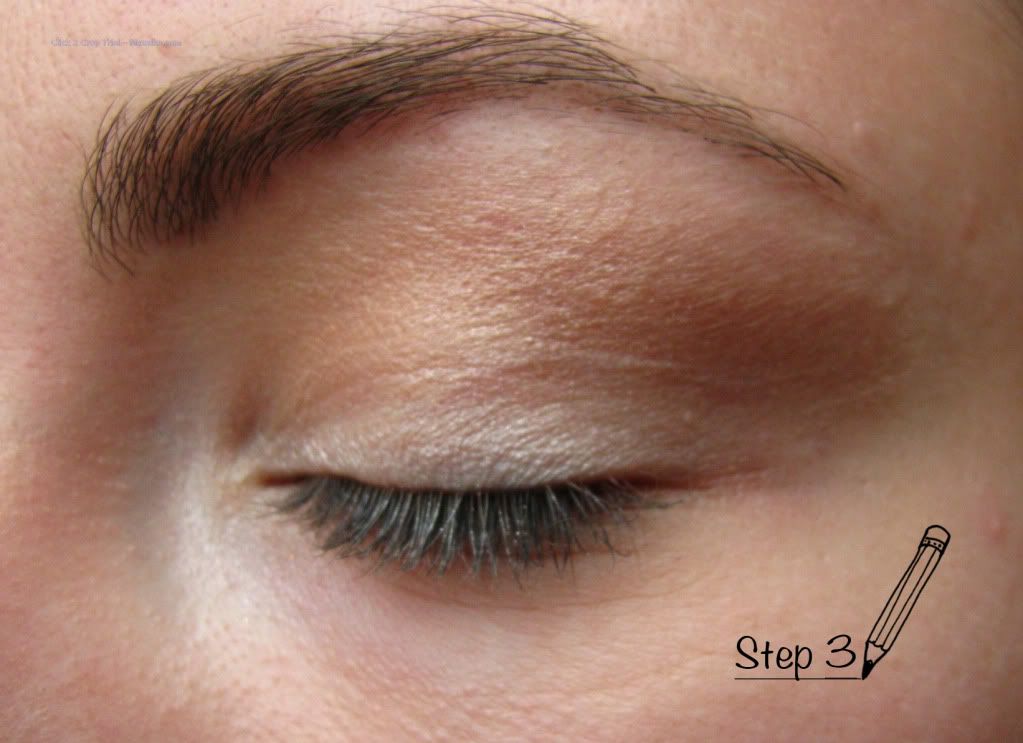
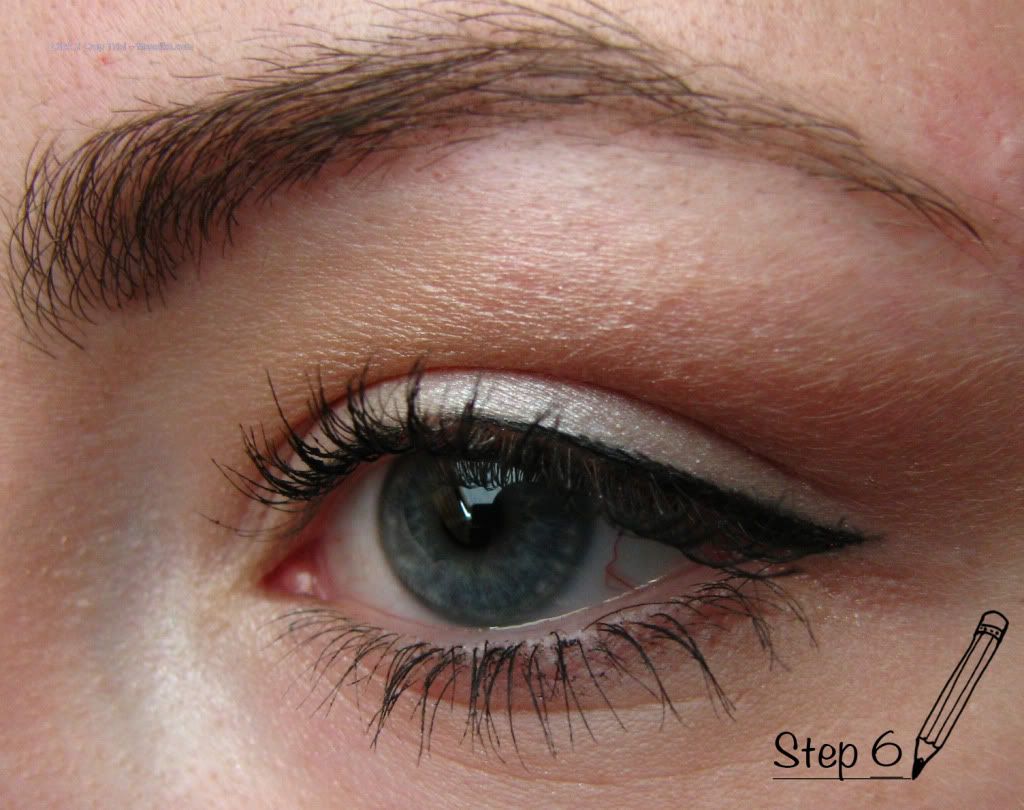
Tip Nr. 3 - Highlight : If you are highlighting the inner tear duct, avoid the most inner part of the eye. I like to highlight first third of the inner part of lower lashline. This will help to drag the attention away from most inner parts.


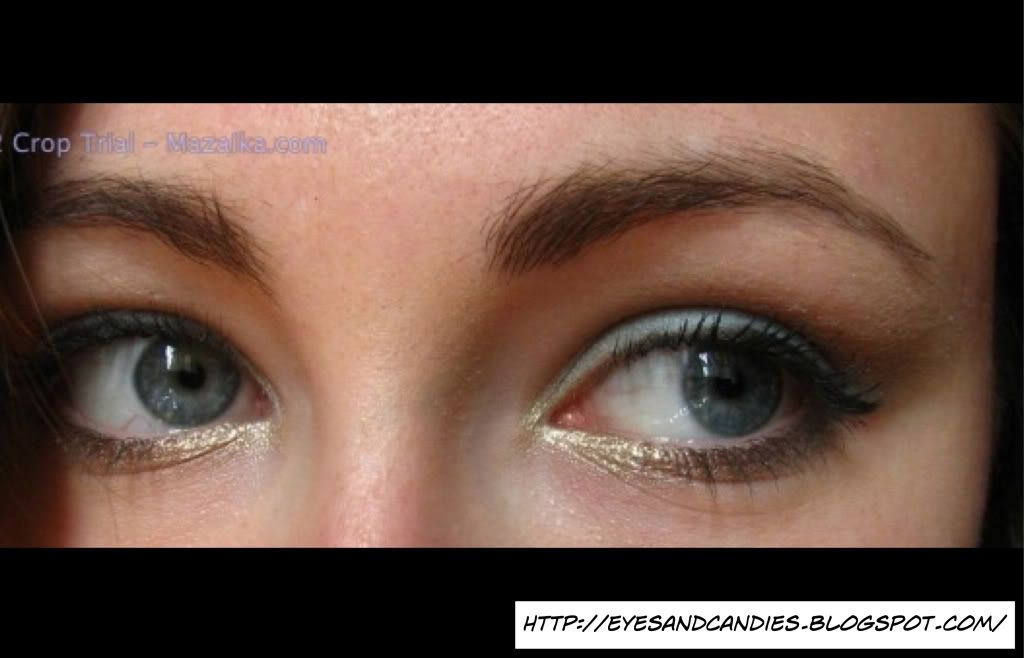
So these are my 3 tips for widening the space between eyes. They really do come handy for me, hope it will help someone too!

Cheers!

Wednesday 7 November 2012

Inspired: 60s trend - Twiggy

Hey!

I have never done a celebrity inspired makeup and I have a party coming up! The theme is "60s"!
So who else could I use as a reference other than Twiggy!


This is a very simple yet graphic look. I think that false lashes aren't necessary.:) And fake freckles go very well with the look.:) 

Monday 30 July 2012

Review: Wet n Wild liquid eyeliners

Today I want to share my thoughts on liquid eyeliners from Wet n Wild that I own. To be specific - two:
- Mega Liner liquid eyeliner


- H2O Proof liquid eyeliner


As other Wet n Wild products, these eyeliners are affordable. But what about their performance?

Firstly, I'm going to talk about the H20 Proof one. 
I bought it about half a year ago. I wanted to try a brown liquid eyeliner for a softer look and since I just wanted to try it out, decided to go with a more cheap product so that I wouldn't regret it. There was no tester in the store so I could see what was the applicator or how it would go on. I got it in Black-Brown.

When I got back home, I tried it out. And I wasn't happy with it at all >.<
The first thing to put me off was the applicator. It's a hard tip one. Don't know how you call it. (terrible if you ask me)


And then I tried it on my hand... And as I recall I was horrified! It was so liquidy, not pigmented enough, and it was hard to apply it on my eyes because of the applicator and since it's so liquidy I felt like it's going into my skin lines. In the picture you can see swatches of one coat of the liner.

So it scared me a lot, and I put it away until recently I found it in my drawer again. I thought I'd give it one more try.
I shook it well, took the applicator with not much products on it and really steadily tried to line my eyes.  I must say, when you put more effort in it, it can work. But I mean it by saying much more effort.
So yes, it can work. And you need to apply several layers of it because it's not pigmented much and because it applies better with less product on.
One positive thing about it I must say is that it is pretty water proof! After trying it on my hand and rubbing it with a wet cotton pad, it doesn't move at all! Well more like it doesn't smudge. But it loses a tiny tiny bit of pigment. So when removing this from your eyes, makesure to use a waterproof makeup remover.

And now moving to Mega Liner.
This liner is my most recent purchase but I have already wore it for a few times. I have it in Plum. Since I still have the packaging of it, let me first let you know what do they claim about the product:

"Fast drying, smudge-proof color. This long-wearing, quick drying formula applies smoothly and evenly for instantly bigger and bolder eyes. Glides on smooth"

Okay, so first things first - this eyeliner has a brush applicator which is so much better compared to the H2O Proof one. Though it's not super fine, I'd say,

But! it's not pigmented much. And because of the formula, it doesn't allow you to create a fine line easily. I'd like it a bit more liquidy because now it feels a bit thick (though not pigmented). Again, you have to work for it a bit. Yes, it does go on quite smoothly, but since it's so not pigmented, you're going to need to apply several coats of it. In the picture you can see swatches of one coat of the liner.

In addition, it's not waterproof or water resistant (not that they claim it is) because as you try rub it of with a wet cotton pad, it comes of right away. Though, as you apply more coats of it, it stays on better.  It is suppose to be long-wearing and if you're not rubbing your eyes or running in the rain, it won't be a problem.:)


SO to sum up, I'm not a fan of these two products. But if I put some effort in it and I'm not rushing trought the door, I can make them work. If you're on a budget, you'll have to practice a tiny bit, mostly witht the H2O Proof eyeliner, because it's so liquidy and can make a big mess thought it is very waterproof and this did impress me! And the Mega Liner one I like because of the colour, plus it has a bit of tiny sparkles in it.

P.S. Emily from Beauty Broadcast on Youtube has mentioned in oen of her videos that she likes Mega Liner. I think she has it in black, so maybe it has a diferent formulation and is more pigmented.

And! You can see me use both of these eyeliners in eye looks:
H20 Proof: "Private beach" eye look!
Mega Liner: Sweet candy-like eyes!

Hope this review helps any of you!

Miss K.

Sweet candy-like eyes!

Hello everyone!

It's been a while since my last post! Today I'm back and I want to share with you guys this look I created for a nice summer day (actually good for spring too!)


It's a soft pastel look created by using light blue and pink shadows and purple eye liners. This looks so sweet and candy like, I just love it!

So to recreate this look or just grab an idea of how you could achieve something similar keep scrolling down!:) And feel free to replace products to what you have ! Always be creative when following a tutorial :)

The shadow part of the look:
1) After priming your eyes, apply a light or baby blue shadow to the inner half of the lids and a nice cool toned pink colour on the second half. Blend the pink up to where you want it to be and blend well! I blended the pink a bit past the crease.
p.s. At this point, I must say I cheated. I could find a suitable pind shadow so what I did is I used a blush instead:
It's Pearlescent Pink by Wet'n Wild. Must add that this blush would go nicely with the look!:)
p.p.s does this mean that my eyes are blushing now? :D


2) To blend these two colours together and give a bit of dimension to your eyes, use a light shimery pink eye shadow in the center of your lids where the colours meet! I used third one in the Maybelline Eyestudio pallete in Intense chic. It's not very pigmently but just lightly pink with a shimmer so it's perfect.

3)With the same light shimerry pink highlight under the brow and in the inner corners of your eyes.

The liner part of the look:
1) As black would be a bit harsh for this sweet pastel look, use a purple liquid eyeliner to line your upper eyelids and wing it out to your liking.

2) Using a light purple or lilac eye pencil (or even the same liquid liner if you want) line your lower lashline about two thirds in.

I used Wet'n Wild's Mega Liner in Plum and an kajal pencil by Essence in 18 Everybody's darling.

Why are we using purple for this look? Well, think of it as if the pink and the blue we used got mixed together and what came out was purple colour! :)

Finally, add mascara and....

... this sweet candy-like look is done! :)

I'm really happy to share this with you guys! And this look brings me so much joy everytime I look in the mirror! So fun and sweet!:)

And I hope you like this! Thank you for joining me and have a lovely day!

Yours delighfully,
Miss K.

Friday 20 July 2012

"Private beach" eye look!


Hey guys!

Every day I go through a list of my favorite blogs and youtube subscriptions and I'd say this is kind of a hobby of mine. It's really fun to see what other people come up with and what they have to share, isn't it?

Today I was really inspired by a nail look done by Nail Nerd which you can find here HERE !
I saw this and fell in love with it! I am so excited that I feel like calling this THE look of summer! 

I really wanted to try it out but my nails are currently 'growing' and 'resting' … 
Also I thought I'd enhance this look a bit and add gold polish on the tips (and I did try it out on my toenails, love it!)

And the more I was looking at the pictures and thinking about it, I thought "why not use this concept for an eye look?"

And so I did!

Here's some pics of what I used BUT everything can be substituted with other products. Be creative! :)


1. Apply white pencil as a base on the lid and slightly wing it out (shape the eye shadow to your liking). 

2. Take a light blue shadow with a dense shadow brush and apply it on the base. 

3. Take a warm chocolate shadow with a fluffy brush, use it to blend the blue and also place it in the crease (just to give some definition and also to neutralize the blue a tiny bit and warm up the look as blue is kind of cold). Find a shape for shadows that complements you the most!

4. Line the lower lash line with a creamy eye shadow (gives a base).

5. On top of the creamy shadow - place the gold in the inner half. With a taupe color - smoke out the outer half of lower lash line.

6. Finally - line the upper lash line (I suggest brown eye liner, black can be too harsh; besides brown will also add warmth), slightly wing it out. Mascara.


Aaaaand finito! 


I am a bit proud of myself to be honest because I feel like I found a way to wear blue on my eyes! I've never been too fond of blue eye shadows (maybe because I think that it actually looks better on blonds)  but this is just really fun and summery! And reminds me of sea, sun light reflection on water surface! So I called this look - "Private beach"!


Hope this will remind you to  enjoy summer while it lasts! Have a great time!

Miss K.

Monday 16 July 2012

Inspired: Copper summer eyes!

Hey guys!

As today I was having my morning coffee and looking throught new videos on 'youtube' from my favourite youtubers, I got inspired by Jen from http://www.frmheadtotoe.com  to do a coppery eye look ( Jen's Bronzed Goddess Makeup Tutorial ). Love her videos! :)

I really love doing a copper look especially because I feel that it brings out my eye colour!

As this is a really simple look, here's a comic book style step-by-step:


Yup!
oh, and one thing I'd like to point out is that it's important to know your eyes and how eye shadows look better on you, concerning crease area. :)
Also, adding gold in your inner corners will really warm up your eyes and add summer feel to the whole look!

More result pics!


So this is my todays eye look!

Have a lovely day!

Miss K.

Saturday 14 July 2012

Academical drawings? Think 3D!


Hey guys!

I have a few thoughts on eyes today. Well, it's more like something I always have in mind whilst doing my eyes.

I've had lots of classes on academical drawing where we would analyze antique "heads", their facial features and try our best to depict them well. 
One of the most often things teachers would say is to treat face as a 3-dimensional object. Yes. Although faces are more viewed from the front, profile (which is the side view) also does characterize us. 
And every single detail on the face must be viewed as 3D, including eyes!
We all now that eyes are basically balls. And eyelids cover the front part. But what is crucial to understand, for example while drawing it, is that eyelids curve around the eye… (I guess you could say that I have been greatly influenced by academical drawing and antique beauty :)


So where I am going with all this?  Well, my main issue is when creating a cat eye using winged eye line, it looks great from the front (that's obvious as you do it looking straight at your eye), but as I turn my head, it rather looks weird >.<. Mainly because my upper eyelid goes down at the side and the winged eyeliner looks like nonsense (at least to me). 

Ah, maybe I am over thinking but this is one thing that I am picky about - doing my eye makeup so that it has no flaws for my liking.

And that is why I always check the sides of my eyes  whilst working of them! :)


I hope this "ramble" made any sense. Hope you have a lovely day!

Always happy to share thoughts - 
Miss K.

Friday 13 July 2012

Go casual with purple!

Hi there!

How often do you use a pop of colour on your eyes? Today is one of those days for me. I chose purple     for todays look because it's really nice and subtle (of course, depends on application!). 

What are the main products for todays look?

So as you can see, today I chose to work with a plumy purple eye pencil. 

Step 1: Let's begin with clean prepared eyes! Apply your foundation/concealer to brighten and even out  your complexion around eyes. Put a neutral eyeshadow all over your eyelid. Is can be a slightly shimmery one as well!
Step 2: Taking plum/purple eye pencil, line your upper lash line from the middle. It doesn't have to be neat. Just make sure that it gets thicker in the end and don't be affraid to put more product on!


Step 3: At this point we are going to smoke out the line we just made. For this I used a small medium density brush. You can also you a cotton swab. Blend it more to the outer part of the eye.
Step 4: Now, tip! when it comes to a smoky look and blending, it's easier to layer colours putting and bleding a bit at a time to avoid making a mess.
So now, line your eyes again and repeat the same process blending it away. Whilst blending, feel free to bring the color to your crease area and remember to keep the colour mostly in the outer part of the eye.

Step 5: Complex step! 1) highlight under your brows and in the inner corners of your eyes (it's optional, of course, but makes your eyes brighter), 2) line your upper lash line; I'm using a felt tip eyeliner - very easy to use, great for beginners :) and 3) apply mascara on both upper and lower lashes and...
... your eyes are done! 

This is a really easy and quite way to wear your eye makeup on those days when you feel like getting a bit more colourful!

Oh, and for the sake of my curiosity I went ahead and photoshopped the final look photo with different eye colour just to see how purple compliments each one. 

I personally think that a bit of purple is complimenting each one of them! What do you think? :)

Cheers and have fun! 

Miss K.

Thursday 12 July 2012

Creative eyeliner: lash illusion!

Hello hello!


I am back today with another simple eye look. This time I decided to get a bit creative and incorporate liner into creating an illusion of fuller lashes


Basically with this method you are "drawing false lashes" on the outer part of your eyelid. This adds fullness and also looks very cute! 


SO let's get on with the steps and I'll explain everything and share some tips! Yey! :)


Step 1: Let's prepare our eyes for the look we are about to do. Use foundation or concealer to cover any redness there is around your eye area and also even out the skin tone. I wanted this look to be a version of a simple cat eye, so we want our eyes plain and matt. Use powder or a skin-toned eye shadow to set the foundation.

Step 2: Using felt tip eyeliner, line your upper lash line. I suggest to start from the middle of your eye and keep the line as close to the lash line AND keep it thin. Then end the line with a flick but keep it thin as well. The important part is to keep any line you make thin!
p.s. whilst lining, fill in noticeable gaps in between you lashes with light dots.


Step 3: This step will help you mark where you want your "falsies" to be. I am using my felt tip eyeliner for this. You can also use sharp eye pencil. Choose how many of those fake lashes you want (I  like making 3!). You will already have one, the furthest one, from lining your eye. So now we need 2 more. Gently mark the "roots" of your new lashes. You can put dots. At this point whilst we are still only marking I wouldn't suggest creating the whole lash because you may not achieve a thin elegant flick with an eye pencil or felt tip liner. 


Step 4: Let's finish those falsies! Take your liquid eye liner which makes pretty thin lines and starting from the tip of the false lash, draw it on and most importantly make sure that every lash you create comes out of the lash line naturally
p.s. to make a fine line make sure you have only a little of the product on your liner tip!


Step 5: Finish of your eyes with mascara. At this point I might say that sometimes I find it pretty when I don't apply mascara on my bottom lashes, it let's you concentrate more on the upper lashes. 
Tip! To exaggerate the outer part of the eye even more, try to 'sweep' your lashes to the side. This also gives your eyes more length AND! this is also helpful for those who have quite short lashes.
p.s. apply a  light shimmery eyeshadow under your brow and in the inner corner for extra cuteness!:)


And your eyes are ready! I really love this and it's a very easy way to add some "falsies" for an extra emphasis! 


I hope you find this trick helpful. Be creative and have a lovely day!


Miss K.

Wednesday 11 July 2012

Todays eye: Simple everyday eye look!

Hello everybody!

I am very excited to finally post my first eye makeup tutorial!

This is a simple eye makeup that could be used for everyday. Every step will be depicted in a photo and described. 
The products that I used for this look can be easily substituted but I will list most of what I used:

  • Maybelline Pure makeup shine-free foundation - since I don't use concealer, I use my foundation to even out the skin tone around my eyes;
  • Maybelline DreamMat powder - for setting the foundation;
  • Wet'n Wild eyeshadow pallete in "Walking on Eggshells";
  • Deborah felt tip eyeliner "24 ORE";
  • Nivea expert eye liner - liquid eyeliner;
  • Loreal Telescopic mascara in black;
  • Maybelline Volum express waterproof mascara.


Now let's proceed to the tutorial!

Step 1: I have applied my foundation also putting it around my eyes and on my eyelids to brighten up my skin tone and make me look more awake and fresh. Also I have my eyebrows filled in with eyeshadow.


Step 2: Now I start working with eyeshadows. Before this you might want to apply an eyeshadow base in case you have oily eyelids and it would help your eye makeup (all that hard work!) stay on for longer and not smudge as much. 
With a flufy blending brush I took the peachy rose colour from the pallete listed above and placed it in my crease and above avoiding the eyelid. Concentrate mostly on the outter part, this will give you a nice enlongened eye effect. Using the brush, I blended edges esspecially above the crease. 


Step 3: Now taking the light shimmery colour form the pallete you want to place it on the center of your lid and in the inner corrner of your eye. I do this using my finger since I'm not a huge brush user.

Step 4: Finally the fun but tricky part - eyeliner. I am using a felt tip eyeliner and starting form the center of my eye I draw a fine line as close to my lash line as possible; the line starts as fine and continues to get a bit thicker as it goes out. 
Now, one important thing to have in mind during this step is that a line starting from the middle of your eye should be fine in the beginning to create an illusion that it is continuing your natural eye shape. You don't want to draw an unnatural looking line, you want it to enhance you eye shape (in other words I could call it your "upper lid curve").
Finally to finish the line, create a tiny flick in the end to give your eye some extra length. Since this is an everyday look for daytime, you don't want it to be too dramatical. Make it tiny and cute!

Step 5: This step is optional. In the steo before I used a felt tip eyeliner which is supposed to be quite intensive and longlasting. It was like that in when I bought t a few months ago. Now it looks wuite soft on the eye - I'd say quite perfect for this look! But since my eyes tend to get quite watery if let's say it's windy outside, my eye makeup in the outter corner tends to smudge. To prevent that I used my liquid eyeliner and painted it over the line I made. This intensifies the line and helps it stay longer! 
p.s. You could also say that I used the felt tip as a guid for my liquid liner !

Step 6: Last step! Apply mascara on both upper and lower lashes. Concentrate on the outter part to lengthen the eye. I use waterproof mascara on my lower lashes because during the day it tends to smudge a bit.


And you're eye makeup is ready! 

Don't forget to smile and have a lovely day!

Yours,
Miss K.